 MENU
MENU
 Przeczytaj fragment on-line

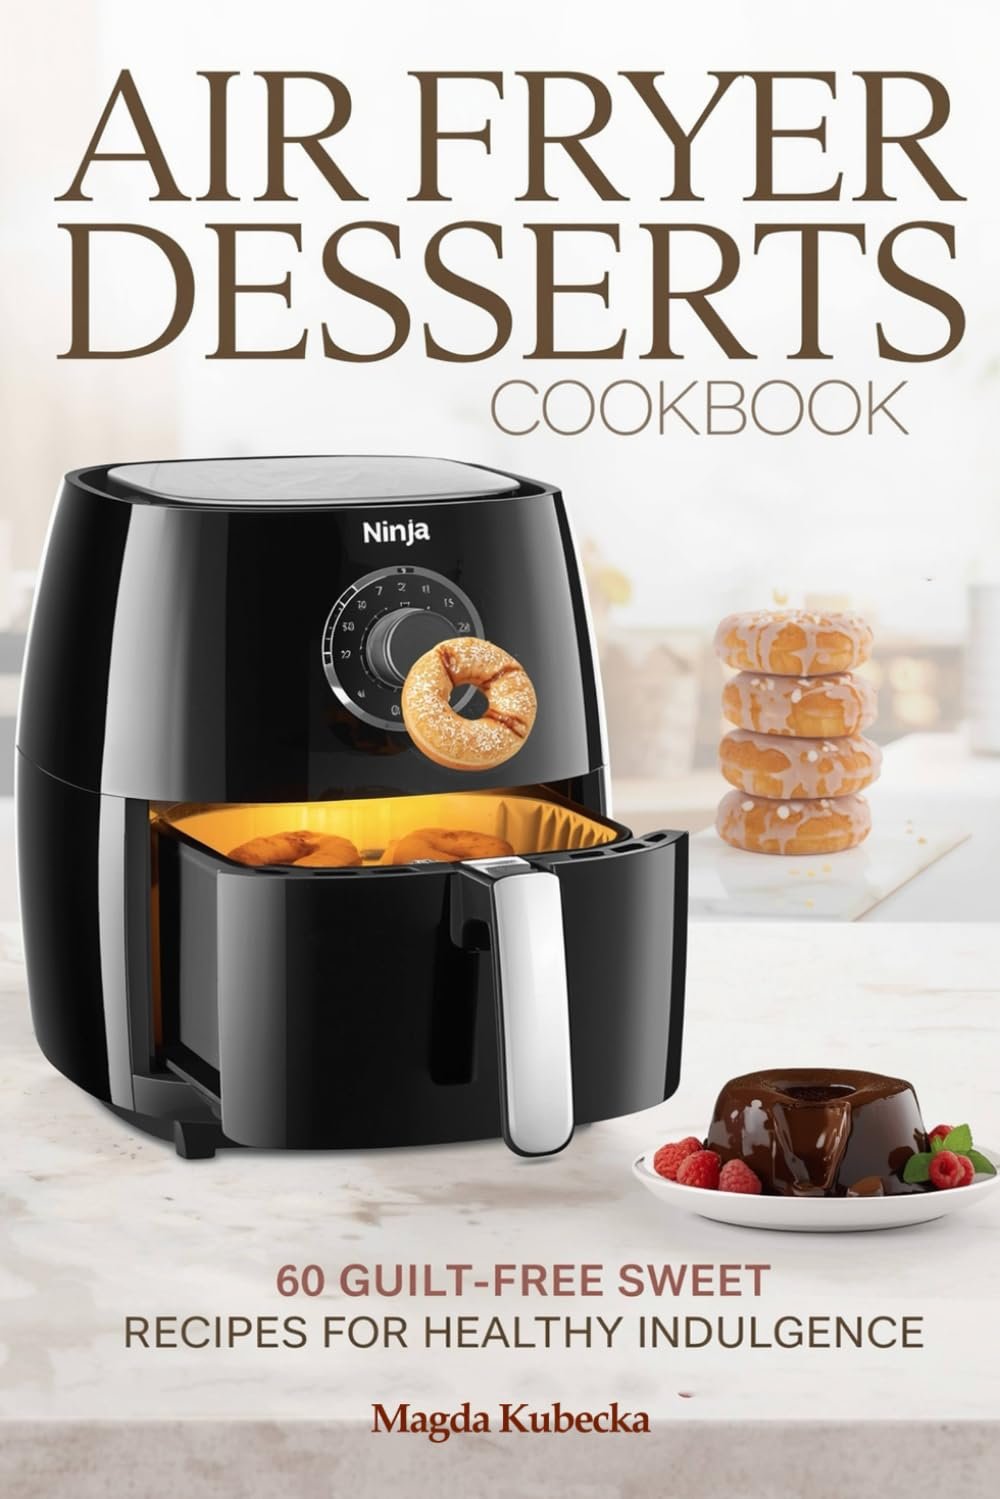
Air Fryer Desserts Cookbook: 60 Guilt-Free Sweet Recipes for Healthy Indulgence (Ninja Friendly) - ebook

Air Fryer Desserts Cookbook: 60 Guilt-Free Sweet Recipes for Healthy Indulgence (Ninja Friendly) - ebook
Discover the magic of air fryer desserts! This irresistible cookbook will completely change the way you think about homemade baking. Your air fryer isn’t just for healthy dinners—it’s your new secret weapon for creating bakery-quality treats right in your own kitchen. Inside this beautifully organized guide, you’ll find over 60 delicious, tested, and foolproof dessert recipes divided into 12 themed chapters. From classic cookies and muffins to elegant French favorites like croissants and madeleines, and festive holiday sweets perfect for family gatherings—each recipe is tailored specifically for the air fryer to guarantee perfect results every time. Every recipe includes step-by-step instructions, precise temperature and timing guides, allergy-friendly substitutions, and helpful baking tips to make your experience smooth and stress-free. You’ll also learn how to adapt traditional recipes for air fryer use and solve common baking challenges with ease.
Ta publikacja spełnia wymagania dostępności zgodnie z dyrektywą EAA.
| Kategoria: | Cooking & Food |
| Język: | Angielski |
| Zabezpieczenie: |
Watermark
|
| Rozmiar pliku: | 137 KB |
FRAGMENT KSIĄŻKI
1: Cookies
Classic chocolate chip cookies
Oatmeal raisin cookies
Butter shortbread cookies
Peanut butter cookies
Spice cookies
2: Muffins and cupcakes
Chocolate muffins with chocolate pieces
Vanilla cupcakes with icing
Blueberry muffins
Lemon cupcakes
Banana-nut muffins
Red velvet cupcakes
3: Doughnuts and donuts
Classic donuts with rose
Donuts with icing
Donuts with chocolate filling
Mini cinnamon donuts
Berlin Doughnuts
4: Cakes and pies
Apple pie in portions
Plum pie
Carrot cake
Pie with crumble and fruit
Yogurt cake
5: Fruit desserts
Baked apples with cinnamon
Pears in caramel
Bananas in batter
Grilled pineapple disks
Baked peaches with honey
Apple chips
6: Churros and fava beans
Classic churros with cinnamon sugar
Mini churros with chocolate
Traditional fava beans
Churros stuffed with dulce de leche
7: Brownies and blondies
Chocolate brownie classic
Blondies with white chocolate
Brownie with nuts
Caramel blondies
Gluten-free brownie
8: Cheesecakes in glasses
Mini New York cheesecake
Cheesecake Basque
Chocolate cheesecake in portions
Cheesecakes with forest fruits
Japanese cheesecake
9: French desserts
Mini croissants with chocolate
Lemon Madlenki
Profiterole
Clafoutis with cherries
Pain perdu (French toast)
10: Sweet snacks
Caramel popcorn
Nuts roasted in honey
Homemade granola
Banana chips
Chocolate-covered almonds
11: Fit and gluten-free desserts
Bean brownie
Sugar free oatmeal cookies
Yam muffins
Date energy balls
Blueberry porridge pancake
12: Christmas specialties
Christmas Gingerbread
Mini poppy seed cake
Gingerbread cheesecake
Cinnamon star cookies
Christmas spice cupcakes
Mini kutia in moldsClassic chocolate chip cookies
INGREDIENTS (FOR ABOUT 20 COOKIES):
- 250 g wheat flour
- 170 g of butter (at room temperature)
- 150 g brown sugar
- 50 g white sugar
- 1 large egg
- 2 teaspoons vanilla extract
- 1 teaspoon of baking soda
- teaspoons of salt
- 200 g chocolate pieces or chocolate drops
METHOD OF PREPARATION:
Start by thoroughly blending soft butter with both types of sugar. This activity should take about 3-4 minutes, until the mixture becomes light and fluffy. It is this step that determines the soft, melting texture of your cookies. Add the egg and vanilla extract, mixing everything until the ingredients are combined.
In a separate bowl, mix flour with baking soda and salt. Gradually add the dry ingredients to the butter mixture, mixing only until they are combined - excessive mixing will make the cookies hard. Finally, gently stir in the chocolate, taking care to distribute it evenly in the dough.
Form walnut-sized balls from the prepared dough, placing them on a plate lined with baking paper. Chill the dough in the refrigerator for at least 30 minutes - this step is crucial for keeping the shape of the cookies when baking in the air fryer. The chilled dough does not melt as quickly, so the cookies retain their thickness and remain soft in the center.AIR FRYER BAKING:
Preheat the air fryer to 160°C. Line the basket of the machine with baking paper, leaving free spaces on the sides for free air circulation. Arrange the cooled dough balls, keeping a gap of about 5 cm between them - remember that the cookies will increase in volume during baking. Depending on the size of the basket, you will bake them in batches of 4-6 pieces.
Bake the cookies for 8-10 minutes, watching their color for the last 2 minutes of baking. The finished cookies should be golden on the edges, but still light in the center. Don't worry if they seem too soft - this is normal! After removing them from the air fryer, leave them on the baking paper for 5 minutes, then transfer them to the griddle. The cookies will harden as they cool, maintaining the perfect texture: crispy crust and soft center.
STORAGE AND VARIANTS:
Store the finished cookies in an airtight container for up to 5 days at room temperature. You can also freeze the raw dough balls and bake them directly from the freezer, increasing the baking time by 1-2 minutes. Experiment with different additions: replace half the chocolate with chopped walnuts or pecans, add 50 grams of oatmeal for a more rustic texture, or use a combination of white, milk and dark chocolate. For lovers of intense flavors, I recommend adding a pinch of sea salt to the top of the cookies just before baking.
NUTRITIONAL VALUES (1 COOKIE): Each cookie provides about 185 kcal, including 9 g of fat, 24 g of carbohydrates (of which 14 g are sugars), 2 g of protein and 0.8 g of fiber. Sodium content is about 95 mg, and saturated fatty acids account for 5.5 g per serving.Oatmeal raisin cookies
INGREDIENTS (FOR ABOUT 15-18 COOKIES):
- 150 g oatmeal (fine)
- 120 g wheat or whole wheat flour
- 100 g butter or coconut oil (solid)
- 80 g cane sugar
- 1 large egg
- 80 g of raisins
- 1 teaspoon cinnamon
- 1 teaspoon baking powder
- 1/4 teaspoon salt
- 2 tablespoons of honey (optional)
METHOD OF PREPARATION:
Start by pouring boiling water over the raisins and letting them sit for 10 minutes - this will make them juicy and soft in the finished cakes. After this time, drain them thoroughly and pat them dry with a paper towel. Meanwhile, combine oatmeal, flour, cinnamon, baking powder and salt in a bowl, mixing everything with a spoon.
Cream the soft butter or coconut oil with the cane sugar for about 2 minutes, until the mixture becomes light. Add the egg and optional honey, mixing just until combined. Now gently stir in the dry ingredients - use a wooden spoon and mix in a folding motion, no longer than necessary. Stirring too long will cause the gluten in the flour to unravel and the cookies to become hard instead of pleasantly crunchy. At the very end, add the dried raisins, distributing them evenly in the dough.
From the finished mixture, form balls the size of a small tangerine, and then gently flatten them with the palm of your hand to a thickness of about 1.5 cm. Arrange the flattened cookies on a plate and put them in the refrigerator for 20 minutes - chilling will help them keep their shape during baking.
AIR FRYER BAKING:
Preheat the air fryer to 170°C. Line the bottom of the basket with perforated baking paper or use a silicone mat with holes - airflow from the bottom is important for even baking. Arrange the cooled cookies, leaving about 3-4 cm of space between them. Due to the size of the basket, you will probably bake them in 3-4 rounds.
Bake for 7-9 minutes, checking the condition of the cookies after 7 minutes. You will recognize the finished cookies by the golden color of the edges - the center should remain lighter and appear slightly undercooked. This is what will give them the perfect texture: a crispy outer layer and a soft, slightly moist center. Remember that the cookies will continue to bake for a while after you remove them from the air fryer, so don't extend the baking time, even if they seem too soft to you.
SUGGESTIONS FOR MODIFICATIONS:
You can boldly replace the raisins with dried cranberries, which will add a pleasant acidity to the cookies. For a more substantial version, add 50 grams of chopped walnuts or almonds. If you prefer a deeper caramel flavor, swap half the cane sugar for maple syrup, making sure to reduce the amount of liquid ingredients.
For those avoiding animal products, prepare a vegan version: replace the egg with a "flax egg" (1 tablespoon of ground flaxseed mixed with 3 tablespoons of water, let stand for 5 minutes), and replace the butter with coconut oil. You can also experiment with spices - add a pinch of cardamom or ginger for an oriental touch, or orange zest for freshness.
NUTRITIONAL VALUES (1 COOKIE): One cookie contains about 125 kcal, 5 g of fat (including 3 g of saturated fat), 18 g of carbohydrates, of which 8 g are simple sugars, 2 g of protein and 1.5 g of dietary fiber. Sodium content is about 65 mg, and the presence of oatmeal provides valuable beta-glucans to support cholesterol levels.
Butter shortbread cookies
INGREDIENTS (FOR ABOUT 24 COOKIES):
- 300 g wheat flour
- 100 g rice flour or cornstarch
- 270 g of butter of the highest quality (82% fat, cold)
- 135 g powdered sugar
- teaspoons of sea salt
- 1 teaspoon of vanilla extract (optional)
METHOD OF PREPARATION:
The key to perfect shortbread is to maintain the classic 3:2:1 ratio, where for every three parts of flour there are two parts of butter and one part of sugar. This sacred ratio guarantees a distinctive, melt-in-your-mouth texture. Cut the cold butter into small cubes and toss it in a bowl with the sifted flours and powdered sugar and salt. Using your fingertips, mash the butter with the flours until you have a mixture that resembles coarse porridge. Work quickly so that the butter doesn't have time to get too hot from the heat of your hands.
When the ingredients begin to come together, add vanilla extract and gently knead the dough, forming a uniform ball. Do not knead the dough for too long - shortbread should be crumbly, and excessive mixing will develop gluten, making them hard. Transfer the dough to a lightly floured board and roll out into a rectangle about 8-10 mm thick. Wrap in cling film and chill in the refrigerator for at least an hour - preferably overnight.
Cut the cooled dough with a sharp knife into even rectangles of about 5x3 cm or 4x4 cm squares. Gently prick each cookie with a fork, creating a distinctive pattern - traditionally there are two rows of three holes. This step not only gives the cookies a classic look, but also prevents them from puffing up too much during baking.
AIR FRYER BAKING:
Set the temperature of the air fryer to 150°C - a lower temperature is crucial for shortbread, which should bake slowly and not brown. Line the basket with baking paper, arranging the cookies in a single layer with about 2 cm gaps. Shortbread does not rise significantly during baking, so you can stack them closer together than other types of cookies.
Bake for 12-15 minutes, watching carefully the last 3 minutes. The finished shortbread should remain creamy-bright all over, with only a slight golden tinge on the very edges. If they begin to brown too much, remove them immediately - overbaked shortbread loses its soft, buttery texture. After removing from the air fryer, leave the cookies on the paper for 5 minutes, then carefully transfer them to the griddle to cool completely.
TRADITIONAL AND MODERN VARIANTS:
You can enhance classic shortbread with finely grated lemon or orange peel by adding it along with powdered sugar. For herb lovers, try a variant with dried lavender (1 teaspoon) or fresh, finely chopped rosemary (2 teaspoons). Prepare a chocolate version by substituting 50 grams of flour for high-quality cocoa and adding 50 grams of finely chopped dark chocolate.
You can also experiment with shapes - use molds to punch out hearts or stars, or sprinkle the cookies with coarse sugar before baking for extra texture. Some bakers dip cooled shortbread halfway in melted chocolate, creating an elegant version for special occasions.
STORAGE:
Shortbread is best stored in a metal tin lined with baking paper - metal ensures a constant temperature and protects against moisture, which is the biggest enemy of the crispness of these cookies. Properly stored they will remain fresh for up to 2 weeks. You can also freeze them for up to 3 months by layering them with parchment paper and packing them tightly.
NUTRITIONAL VALUES (1 COOKIE): A single shortbread cookie provides about 110 kcal, contains 7 g of fat (of which 4.5 g is saturated fat), 11 g of carbohydrates, including 4 g of sugars, 1 g of protein, and a minimal amount of fiber (0.3 g). Sodium content is about 40 mg, and high-quality butter provides vitamin A and small amounts of vitamin D.
Peanut butter cookies
INGREDIENTS (FOR ABOUT 16 COOKIES):
- 250 g peanut butter (smooth or with chunks)
- 150 g brown sugar
- 1 large egg
- teaspoons of baking soda
- 1/4 teaspoon salt
- 60 g wheat flour (optional, for a firmer texture)
- 1 teaspoon vanilla extract
METHOD OF PREPARATION:
The beauty of these cookies lies in their simplicity - you can literally prepare them in one bowl. Start by mixing peanut butter and brown sugar with a wooden spoon until the ingredients are thoroughly combined. The consistency will be thick and slightly grainy from the sugar. Add the egg and vanilla, stirring vigorously until the mixture becomes uniform and glossy. Finally, pour in the baking soda, salt and flour, if you choose. The version without flour will give you intensely nutty, very soft cookies that melt in the mouth, while adding flour will make them more dense and less crumbly.
These cookies do not require long mixing or blending - the natural density of peanut butter makes all the ingredients come together quickly and effortlessly. Stirring too much can cause the peanut butter oil to separate, spoiling the texture of the finished cookies. Form walnut-sized balls from the finished dough, placing them on a plate. There is no need to chill this dough - you can start forming right away.
Place each ball on a piece of baking paper and gently flatten with a fork, pressing first in one direction, then turn the fork 90 degrees and press again, forming a distinctive lattice. It's not just for decoration - the flattening helps the cookies bake evenly, since peanut butter cake doesn't melt like traditional butter cake.
AIR FRYER BAKING:
Preheat the air fryer to 165°C. Line the basket of the machine with baking paper, leaving free spaces for air circulation. Arrange the flattened cookies with about 4 cm spacing - these cookies expand slightly during baking. Due to the size of the basket you will bake them in 2-3 rounds.
Bake for 6-8 minutes, with the cookies without flour being ready after 6 minutes, and those with flour may need a full 8 minutes. The finished cookies will have an intense golden color and will appear very soft, even undercooked - this is normal! Leave them in the basket of the air fryer for 3 minutes after turning off the machine, then very carefully transfer them with the paper to the griddle. Peanut butter cookies are extremely crumbly right after baking and fall apart easily - only after they have cooled completely do they gain the right texture.
VARIOUS VERSIONS AND MODIFICATIONS:
For chocolate lovers, add 80 g of chocolate drops or chopped dark chocolate to the cake - the combination of nuts and chocolate is a classic that never disappoints. You will introduce a tropical touch by adding 40 g of coconut flakes, which will give the cakes extra crunch. Before baking, you can also coat the dough balls in crystal sugar or cane sugar - this will give the effect of a crunchy shell contrasting with the soft interior.
Experiment with different nut butters: almond butter will give a softer flavor, cashew nut butter will create a creamy, mild version, and tahini butter will give the cakes an oriental touch. Each of these butters may contain different amounts of oil, so you may need to slightly adjust the amount of flour. For a fit version, you can replace some of the brown sugar with xylitol or erythrol, although this will affect the texture - the cookies will be drier.
NUTRITIONAL VALUES (1 COOKIE): One cookie contains about 135 kcal, 8 g of fat (including 1.5 g of saturated fat), 12 g of carbohydrates, of which 9 g are sugars, 4 g of protein, and 1 g of fiber. Sodium content is about 95 mg, and peanut butter provides valuable unsaturated fatty acids, vitamin E and magnesium, making these cookies a more nutritious treat than traditional candy.
Spice cookies
INGREDIENTS (FOR ABOUT 24 COOKIES):
- 280 g wheat flour
- 125 g of butter (at room temperature)
- 100 g cane sugar
- 2 tablespoons of molasses (or an additional 30 g of cane sugar)
- 1 medium egg
- 2 teaspoons of ground ginger
- 1.5 teaspoons of cinnamon
- teaspoons of nutmeg
- 1/4 teaspoon ground cloves
- 1 teaspoon of baking soda
- teaspoons of salt
METHOD OF PREPARATION:
In a medium bowl, thoroughly mix the flour with all the spices, baking soda and salt. Sifting is not necessary, but mix the dry ingredients well so that the spices are evenly distributed - this will ensure that each cookie has a full, balanced spice flavor. The aroma wafting from the bowl already at this stage promises how wonderful the finished cookies will be.
In a separate, larger bowl, beat soft butter with cane sugar and molasses for about 3 minutes, until the mixture becomes light and fluffy. The molasses not only imparts a deep caramel flavor, but also keeps the cookies moist. Add the egg and mix another minute. Gradually add the flour-spice mixture, stirring just until the ingredients are combined. This will form a fairly thick, flavorful batter.
Transfer the dough to a piece of cling film, form a flat disk and wrap tightly. Chill in the refrigerator for at least an hour, and preferably overnight - this time will allow the spices to penetrate the entire dough, and also make it easier to roll out. Divide the chilled dough into two parts and roll out each on a floured board to a thickness of 3-4 mm. The thinner the cookies, the crispier they will be when baked. Using cookie molds, cut out different shapes - traditional stars, hearts or people work great.
AIR FRYER BAKING:
Preheat the air fryer to 160°C. Line the bottom of the basket with baking paper, taking care to leave space for air circulation. Arrange the die-cut cookies in a single layer, keeping about 2 cm space between them - they will expand slightly during baking. Depending on the size of the basket, you will fit 6-8 cookies at a time, so be prepared to bake in several rounds.
Bake for 5-7 minutes, with thin cookies (3 mm) being ready after 5 minutes, and thicker ones may require a full 7 minutes. This is a crucial time - spice cookies go from perfectly baked golden color to burnt edges very quickly. Watch them carefully for the last 2 minutes of baking. The finished cookies should be evenly browned, and when touched in the center they should appear to be baked, but not hard. After removing them from the air fryer, let them rest on the paper for a minute, then transfer them to the griddle to cool completely.
DECORATION AND FINISHING:
You can decorate cooled cookies with royal icing - whisk egg whites with powdered sugar and a little lemon juice until thick, white. Using a confectionery sleeve or a small plastic bag with a cut corner, create delicate patterns, outlines or completely cover the surface of the cookies. You can sprinkle colored sugar, chopped nuts or dried fruits on top of the freshly applied icing.
You can adjust the intensity of the spices according to the season - winter cookies can be more aromatic, with double the amount of ginger and the addition of a pinch of cayenne pepper for a warming effect. You can temper spring versions by reducing the amount of cloves and adding orange zest. Some like to dip the cookies halfway in melted white or dark chocolate, creating an elegant version for the holiday table.
STORAGE:
Store spice cookies in an airtight metal or plastic container, layering them with parchment paper - this will prevent any frosting from sticking together and keep them perfectly crisp. Under the right conditions, they will remain fresh for up to 10 days, although their flavor is most intense during the first 3-4 days. You can also freeze them for up to 2 months - thaw at room temperature without removing from the container to avoid condensation.
NUTRITIONAL VALUES (1 COOKIE): One cookie provides about 95 kcal, contains 4 g of fat (including 2.5 g saturated), 14 g of carbohydrates, of which 6 g are sugars, 1.5 g of protein and 0.5 g of fiber. Sodium content is about 80 mg, and spices provide valuable antioxidants, especially cinnamon helps regulate blood sugar levels, and ginger has anti-inflammatory effects.Chocolate muffins with chocolate pieces
INGREDIENTS (FOR 12 MUFFINS):
METHOD OF PREPARATION:
The preparation of chocolate muffins is based on the classic muffin method, which guarantees fluffy and moist baked goods. In a large bowl, combine all dry ingredients: sifted flour, cocoa, sugar, baking powder, baking soda and salt. Mix thoroughly with a whisk to distribute the ingredients evenly.
In a separate bowl, whisk eggs, add milk or buttermilk, oil and vanilla extract. Mix thoroughly until the ingredients combine into a homogeneous mass. Now comes the key moment - pour the wet ingredients into the dry ones and gently mix with a wooden spoon or silicone spatula, using a bottom to top motion. Mix only until the flour is moistened - the batter should be lumpy and uneven. This is the secret to perfect muffins! Excessive mixing develops the gluten in the flour, resulting in hard, rubbery baked goods instead of fluffy muffins. At the very end, stir in the chocolate chunks with just a few movements of a spoon.
AIR FRYER BAKING:
Preheat the air fryer to 170°C for about 3 minutes. Fill silicone or paper muffin molds with batter, filling them up to 3/4 height. The air fryer basket will usually fit 4-6 molds, depending on the size of the machine - do not crowd them, leaving small gaps between them for free air circulation.
Bake the muffins for 12-15 minutes. Check readiness by poking a wooden stick into the center of the muffin - it should come out with fine, moist crumbs, but not raw batter. Remember that a slightly undercooked center is the advantage of chocolate muffins - after cooling, they will be perfectly moist in the center, and the chocolate will remain pleasantly melted.
VARIANTS AND STORAGE:
You can create a double-chocolate version by sprinkling the top of each muffin with additional chocolate chips before baking - they will form an appetizing, crunchy shell. For true chocolate lovers, I recommend a surprise variant: before baking, place a chocolate cube in the center of each portion of the cake, which will form a liquid chocolate heart after baking.

